Notification Center and Notification Summary
이 포스트는 edwith의 iOS 프로그래밍을 공부하고 정리한 내용입니다.
edwith iOS 프로그래밍 - Notification Center And Notification
노티피케이션 센터와 노티피게이션
Notification
- 등록된 노티피케이션에 노티피케이션 센터를 통해 정보를 전달하기 위한 구조체이다
주요 프로퍼티
- name : 알림을 식별하는 태그.
var name: Notification.Name
- object : 발송자가 옵저버에게 보내려고 하는 객채. 주로 발송자 객체를 전달하는 데 쓰임.
var object: Any?
- userInfo: 노티피케이션과 관련된 값 또는 객체의 저장소
var userInfo: [AnyHashable: Any]?
-
Example)
-
특정 행동으로 인해 작업이 시작되거나 완료되는 시점에 다른 인스턴스로 노티피케이션이 발생 시 필요한 데이터를 같이 넘겨 줄 수 있다.
-
간단한 예로 네트워킹을 이용하는 애플리케이션이라면 네트워킹이 시작 및 완료괴는 시점, 음악 및 동영상 재생 등에도 재생이 끝나는 시점에 관련 정보를 넘겨 줄 수 있다.
-
Notification Center
-
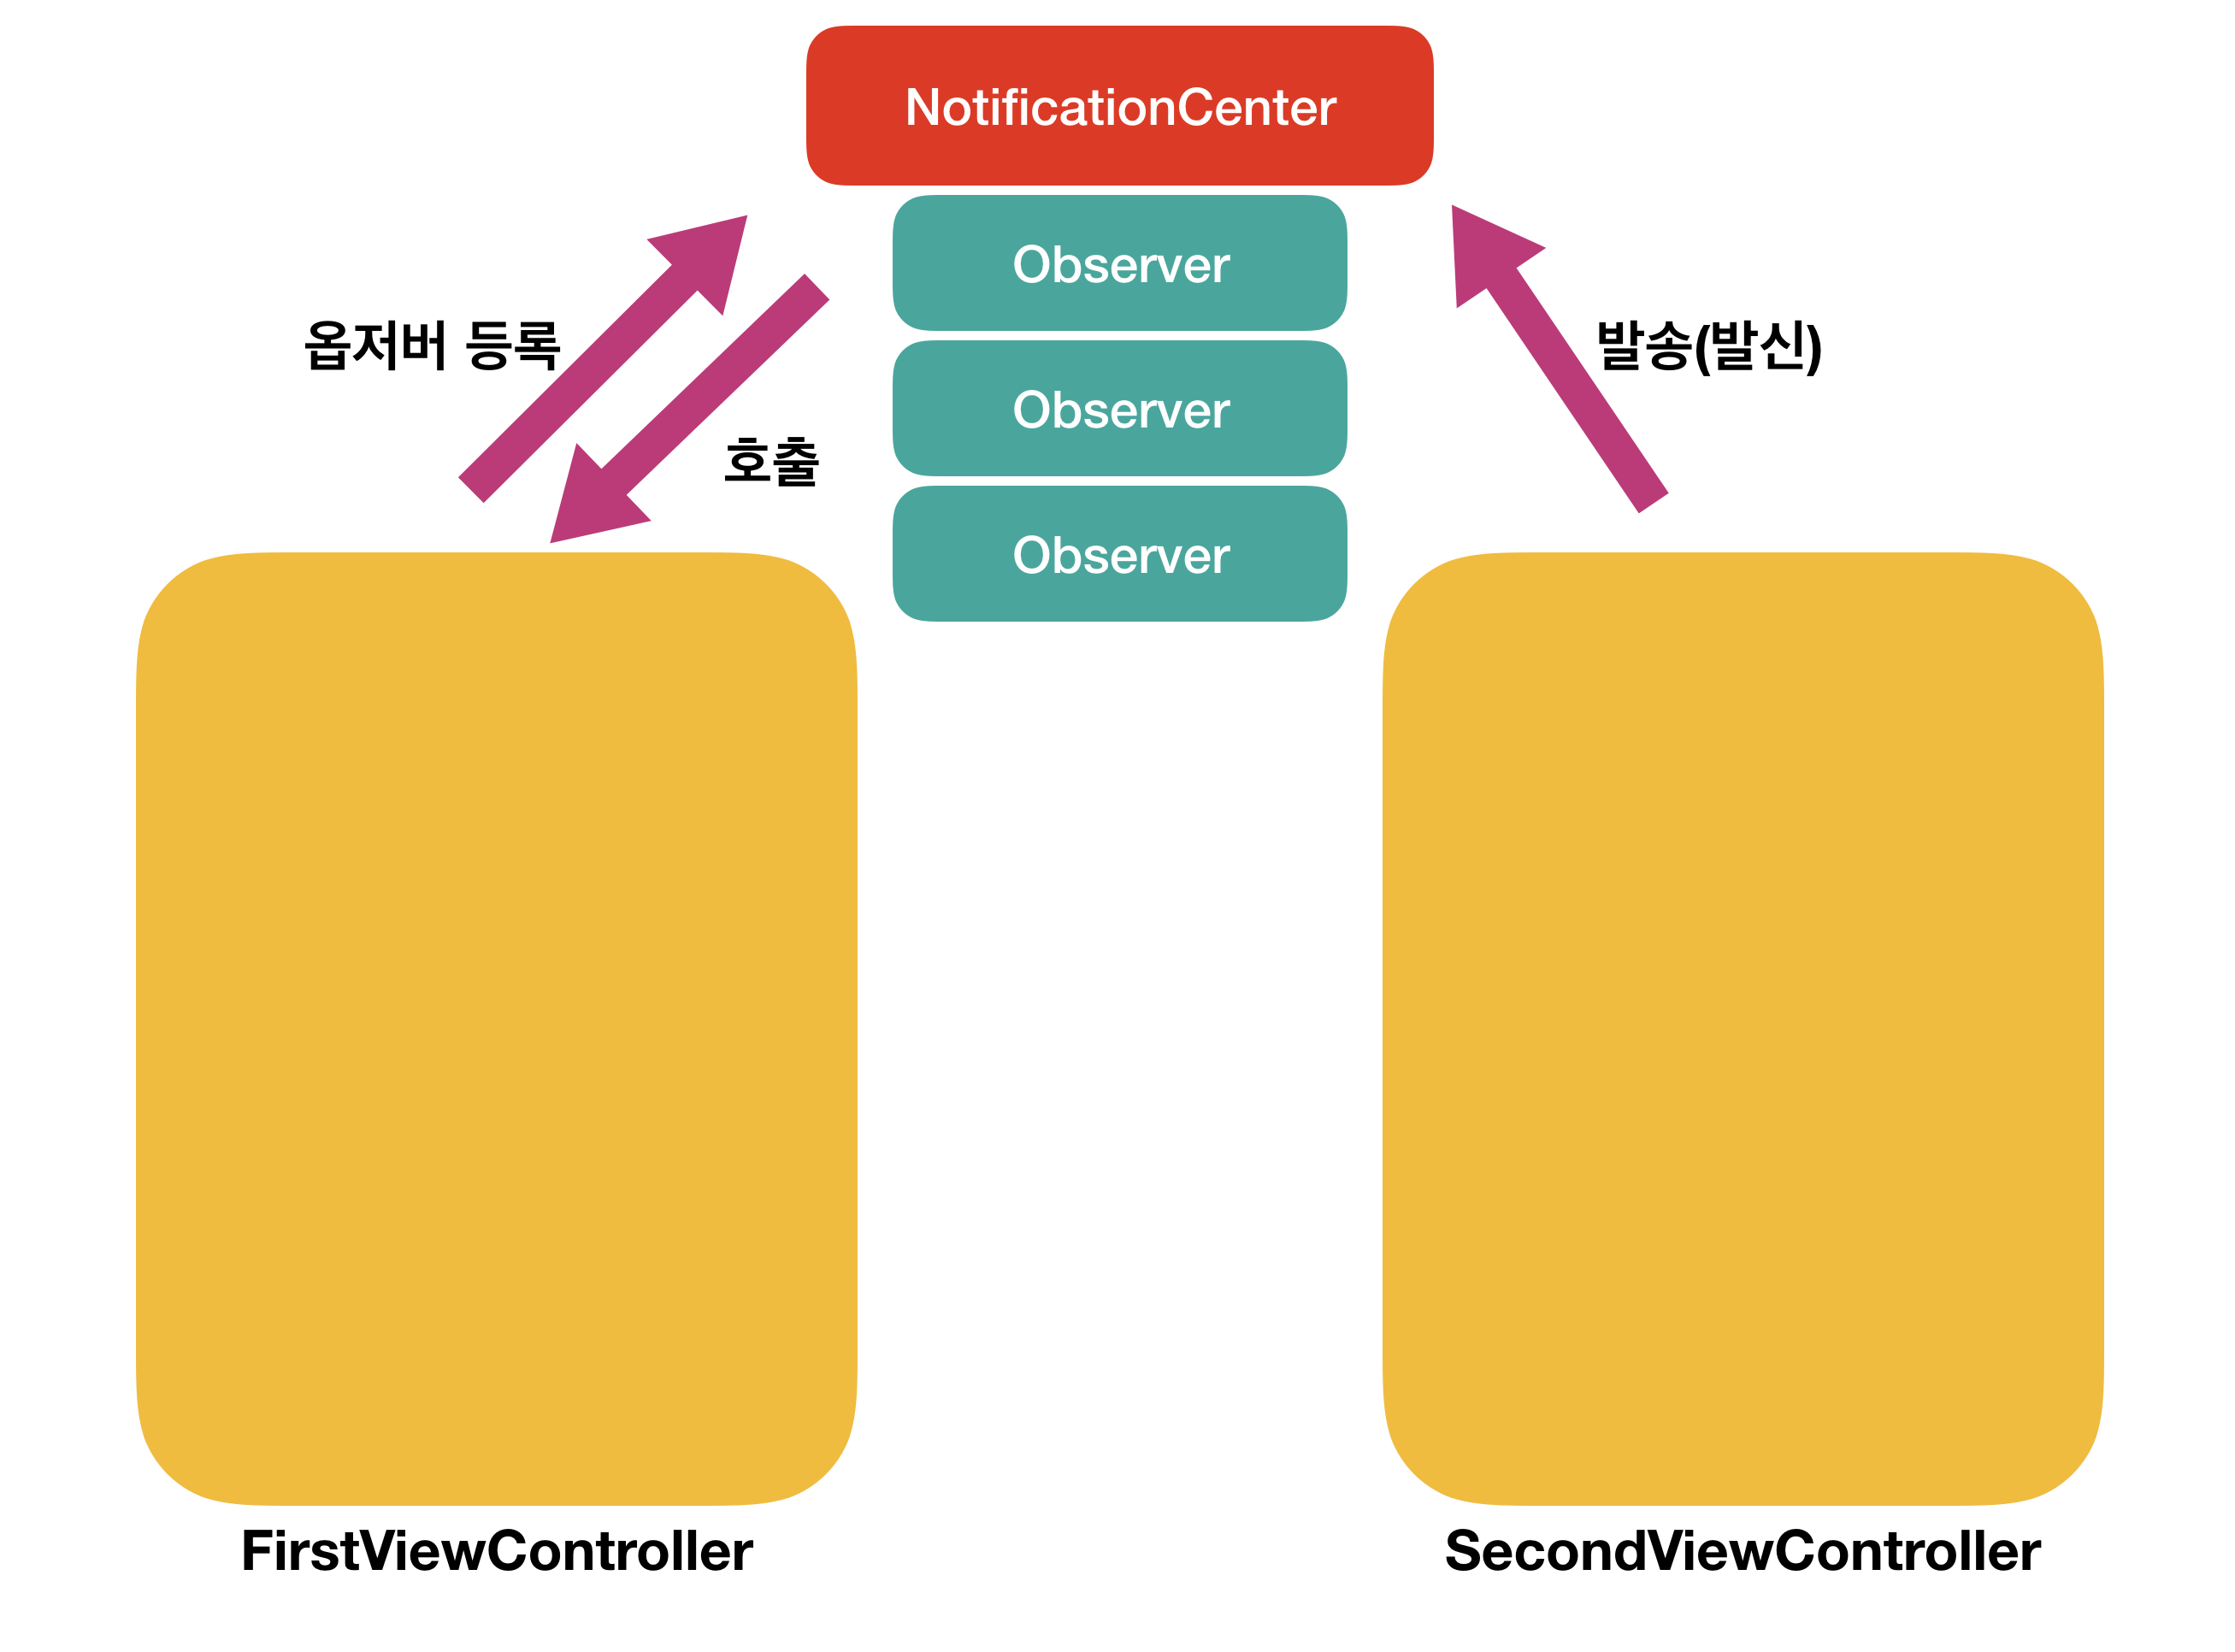
등록된 옵저버에게 동시에 노티피케이션을 전달하는 클래스
-
NotificationCenter 클래스는 노티피케이션을 발송하면 노티피케이션 센터에서 메시지를 전달한 옵저버의 처리할 때까지 대기한다.
- 즉, 흐름이 동기적(Synchronous)으로 흘러간다.
-
노티피케이션을 비동기적으로 사용하려면 NotificationQueue를 사용하면 된다.
기본 노티피케이션 센터 얻기
- default : 애플리케이션의 기본 노티피케이션 센터이다.
class var 'default': NotificationCenter {get}
옵저버 추가 및 제거
- addObserver(forName:object:queue:using:) : 노티피케이션을 노티피케이션 대기열(Queue)과 대기열(Queue)에 추가 할 블록(스위프트의 클로저), 노티피케이션 이름을 노티피케이션 센터의 메서드를 가리키는 장소(디스패치 테이블, Dispatch Table)에 이름을 추가한다. 여기서 object에 특정 객체를 명시하면 명시한 객체가 발송한 노티피케이션일 때에만 해당 히름의 노티피케이션을 수신한다.
func addObserver(forName name: NSNotification.Name?,
                    object obj: Any?,
                        queue: OperationQueue?,
                    using block: @escaping(Notification) -> Void) -> NSObjectProtocol
- addObserver(_:selector:name:object:) : 노티피케이션을 노티피케이션 센터의 메서드를 가르키는 장소에 이름을 추가한다
func addObserver(_ observer: Any,
        selector aSelector: Selector,
                name aName: NSNotification.Name?,
            object anObject: Any?)
- removeObserver(_:name:object) : 노티피케이션 센터의 메서드를 가리키는 장소에서 일치하는 이름을 제거한다.
func removeObserver(_ observer: Any,
                    name aName: NSNotification.Name?,
                object anObject: Any?)
- removeObserver(_:) : 노티피케이션 센터의 메서드를 가리키는 장소에서 모든 이름을 제거한ek.
func removeObserver(_ observer: Any)
노티피케이션 발송
- post(_:) : 저장된 노티피케이션을 노티피케이션 센터에 발송한다.
func post(_ notification: Notification)
- post(name:object:userInfo:) : 지정된 이름, 보낸 객체, 보낼 정보로 노티피케이션을 만들어 노티피케이션 센터에 발송한다
func post(name aName: NSNotification.Name,
        object anObject: Any?,
        userInfo aUserInfo: [AnyHashable: Any]? = nil)
- post(name:object:) : 지정된 이름, 보낸 객체로 노티피케이션을 만들어 노티피케이션 센터에 발송한다.
func post(name aName: NSNotification.Name, object anObject: Any?)
예제
일반 노티피케이션
- 옵저버 등록
NotificationCenter.default.addObserver(self, selector: #selector(didRecieveTestNotification(_:)), name: NSNotification.Name("TestNotification"), object: nil)

@objc func didRecieveTestNotification(_ notification: Notification) {
    print("Test Notification")
}
- 발송자
NotificationCenter.default.post(name: NSNotification.NAme("TestNotification), object: nil, userInfo: nil)
User Info 정보를 담은 노티피케이션
- 옵저버 등록
NotificationCenter.default.addObserver(self, selector: #selector(didReceiverTestNotification(_:), name: NSNotification.Name("TestNotification"), object: nil)

@objc func didReceiveTestNotification(_ notification: Notification) {
    guard let testString: String = notification.userInfo?["TestString"] as? String else { return }
    print("testString:", testString)
}
- 발송자
let userInfo: [AnyHashable: Any] = ["TestString":"Hi"]

NotificationCenter.default.post(name: NSNotification.Name("TestNotification"), object: nil, userInfo: userInfo